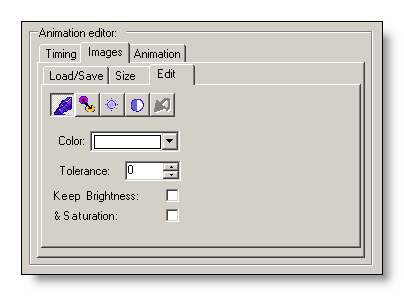
This section describes the image-editing functions provided by the Edit-TabPage. These functions can be used for some basic editing of Animation frame-images. For more complex painting and image-editing it is strongly suggested to take advantage of the functions provided by specialized image-editing or drawing applications.
Undo
We discuss the Undo-button first, because it is of general use, when working with the functions provided by the Edit-TabPage.
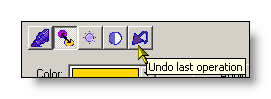
This button is usually only enabled, after one of the other editing-functions has been used on a frame-image. In this case, the last operation can be reversed. If another frame is selected in the Frames-Grid, the button will be disabled again and the last performed operation on the previously selected image can not be reversed anymore.
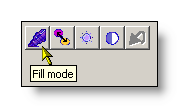
Fill-mode
The Fill-mode is used to flood-fill areas of one color with a new color. This mode is activated through the Fill-button in the toolbar:
The main purpose of this function is to quickly fill defined regions of an image with another color. For instance, a problem that often occurs, is that one has finally found a matching animated symbol required for the tooltip of a control, but it turns out that the background of its frame-images do not match the carefully designed tooltip-layout. In such a situation, the Fill-mode provided by the Animation-Editor turns out to be quite handy. The following example shows how easy the background color of a frame-image can be made transparent with the help of the Fill-mode.
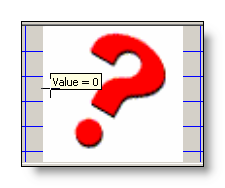
For this example we load the file "RotatingQuestionMark.afx" from the "<ToolTipsFactoryHomeDir>\Animations"-directory into the Animation-Editor (see Animation-Handling"). As can be seen from Picture 1, the background of the individual frames is pure white, but a transparent background would be nicer in order to use the question-mark as an adorning element for SingleLineToolTips (AnimatedSymbol):
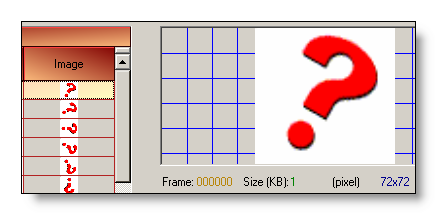
(Picture 1)
To fill the white background with another color, the new color (in this case: Transparent) has to be selected in the Color-control:

To apply this new color to the desired area of the image, it is necessary to click into the target area with the mouse-pointer. This will instantly flood-fill all neighboring pixels of the same color with the new one:
 |
 |
| (before) | (after) |
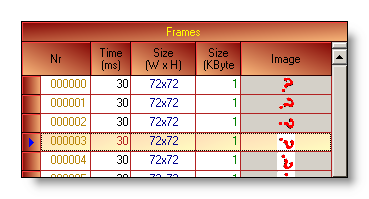
As can be seen, the white background has disappeared as desired. The background of the other frame images can now be quickly replaced the same way by just selecting each frame and clicking into the white colored area. The change is always instantly reflected by the Frames-Grid as well:
Replace-mode
The Replace-mode is used to replace one color with another one. This mode is activated through the Replace-button in the toolbar:

The main purpose of this function is to quickly replace one color with another one. This is best shown again with the same sample Animation ( "RotatingQuestionMark.afx") as above.
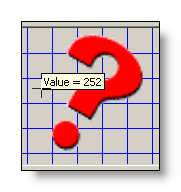
To replace the white background with another color, the target color (in this case: Transparent) has to be selected in the Color-control:
To replace a color (source) with the new one (target), the color that has to be replaced has to be specified as well. This is done by pointing to a pixel of this color with the cursor and then click the left mouse-button. This will instantly change the color of all pixels with the same source-color to target-color:
|
|
| (before) | (after) |
At first glance it seems that there is no difference to the Fill-function described above, because, if applied to the background of the the "RotatingQuestionMark"-Animation, it produces the same result. The difference will become only visible, if the red question mark also contains a white area and both methods are applied to this image, as shown below:
| Before | After | |
| Fill: | 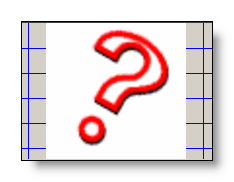 |
 |
| Replace: | 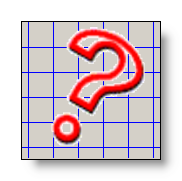 |
Now the difference between the two functions becomes clear: While the Fill-function only affects neighboring pixels with the same source-color, the Replace-function changes the color of all pixels with the same source-color.
The Replace-function offers some additional features which allow the replacement of similar colors. This is done by specifying a Tolerance-value, which indicates a maximum numerical "distance" between the RGB-values of the selected source-color and the color of each evaluated pixel in the image. All pixels, where the RGB-distance is smaller then the specified Tolerance, will get the new color assigned.
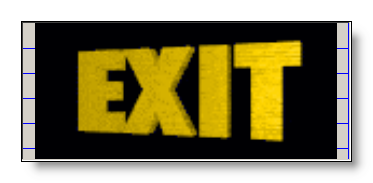
To test this behavior, we load another sample-animation ("Exit.afx") from the "<ToolTipsFactoryHomeDir>\Animations"-directory into the Animation-Editor:
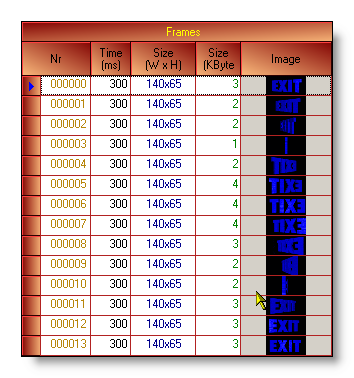
In the following steps we will try to convert the "Exit"-sign from blue to orange without loosing any details or quality. At first this seems to be a rather difficult task, but with the help of the additional features provided by the Replace-function, we are going to do this quite quickly.
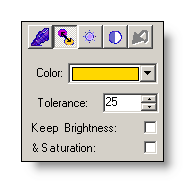
As a first step, the parameters have to be set-up correctly as shown below. Because it is hard to say, which value to use as Tolerance, it makes sense to start with an arbitrary value and then adapt it according to the result:
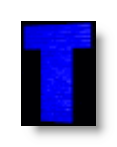
If this values are applied to the image by clicking in one of the brighter areas of the letter "T", we get something like this:
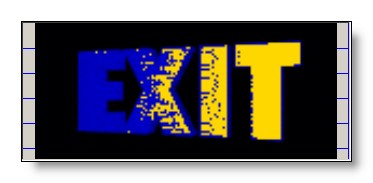
This result reveals two problems. The most obvious one of course is, that not all blue pixels have turned orange. This happens normally, when the Tolerance-value was set too low.
The other - more serious - problem, is the fact, that all details and structures in the orange areas have been lost. This is clearly visible on a closer inspection of the letter "T" before and after the replacement-operation:
 |
 |
| (before) | (after) |
This happens, because the Replace-function looks for all pixels that have a color in the range defined by the source-color and the Tolerance, and all pixels that match this criteria get the specified target-color without considering the brightness and the saturation of these pixels.
Luckily, the Replace-function offers the possibility to assign the target-pixels only the shade of the new color and to preserve the Brightness and the Saturation of the original pixel. This is done by checking the two check-boxes as shown below. In the same step, we also try another Tolerance-value in order to get more blue pixels converted:

Because our previous try did not give the desired result, we should undo the previous operation in order to start from the original image. By clicking the Undo-button, we should get back the completely blue "Exit".
As soon as the image is in its original state, we can apply the new values by clicking on the same spot as in the first try. The result now looks much better: All blue pixels have converted to orange and all structures from the original have been preserved:
With this, the first image of the movie-clip has been successfully converted. We could now proceed and do the same with all other frames. This is no big deal for short sequences, but what, if there are dozens or even hundreds of similar frames to process?
Again a feature of the Replace-function comes to the rescue. As soon as a Replace-operation has been applied to a frame-image, a new button appears next to the parameters:
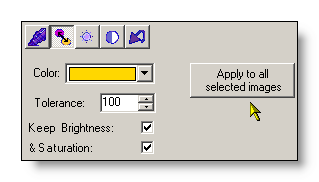
This button gives the possibility to apply the last Replace-operation to all frames selected in the Frames-Grid. The frames, to which the same operation should be applied, can also be selected after having successfully applied a Replace-operation on a single frame. Therefore, we can just go to the Frames-Grid, select all frames of our sample-movie and click the "Apply"-button. The movie-clip below shows what happens:
Brightness-control
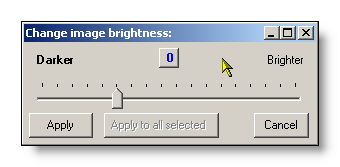
The Brightness-button opens a small dialog box which allows to change the brightness of a frame-image.
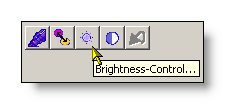
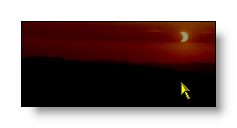
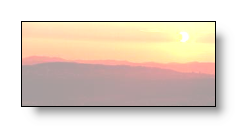
This function is seldom used to work on the brightness of drawings, its main purpose is more to correct the brightness of photos. In order to demonstrate the effect of the Brightness-control, we import one single photo (Eclipse.jpg) from the "<ToolTipsFactoryHomeDir>\Images"-directory and click on the Brightness-button to get access to the Brightness-control:
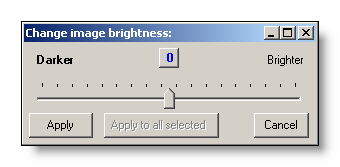
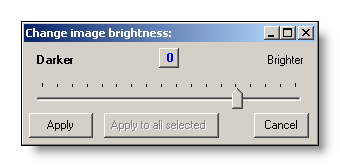
With the slider it is possible to make the selected image brighter or darker. This ranges from complete dark (0% brightness) to complete white (100% brightness). Every time the slider is moved, the image displayed in the preview-panel will immediately reflect the change. The change will only become permanent by clicking on the Apply-button. If multiple frames have been selected in the Frames-Grid, it is possible to apply the same brightness-change to all selected frames with a click on the "Apply to all selected"-button, which is only enabled when multiple frames are selected.
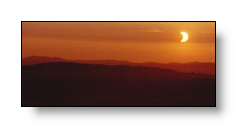
The following table shows the "Eclipse.jpg"-photo in its original state and with increased and decreased brightness:
|
|
 |
 |
 |
 |
 |
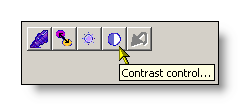
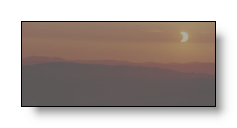
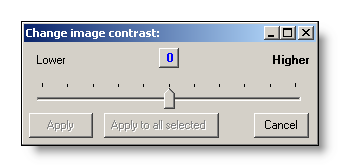
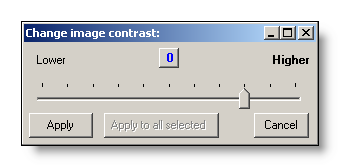
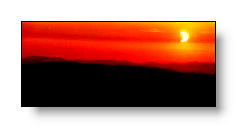
Contrast-control
The Contrast-button opens a small dialog box which allows to increase or decrease the contrast of a frame-image.
The usage of this function is identical to the Brightness-control described above. Only the effects are different, as the samples below demonstrate:
|
|
 |
 |
|
 |
 |
