Task-based Tutorial - How to use ToolTips with the
Infragistics UltraWinGrid
This article shows, how the ToolTipsFactory
tooltips can be used together with one of the many available third-party
grid-components. As a representative for this category, we picked the popular Infragistics
UltraWinGrid-control.
The
theory - with code-templates - how the tooltip components can be integrated
with generic grid-controls has been discussed in the section on "How to use ToolTips with grid-controls".
In this section we are going to use this knowledge to integrate an
ImageToolTip with the Infragistics
UltraWinGrid-control into a real application. In contrast to the Microsoft DataGrid,
the Infragistics
UltraWinGrid-control offers more functions and events, which facilitate the
integration of the ToolTipsFactory
tooltips. Therefore, - due to the differences between the various
grid-controls - the code presented in this example will slightly differ from
the approach used in the discussed template.
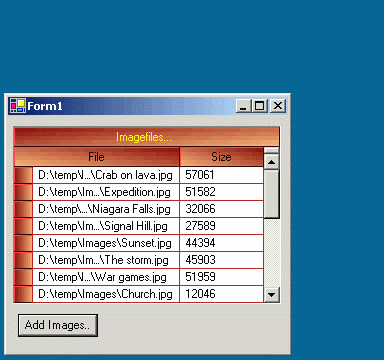
This application (UltraWinGrid1)
allows the user to add image-files to a UltraWinGrid-control,
which lists the complete filename and the size of each file. If the cursor is
moved over the grid, the ImageToolTip will pop-up and display the image of the
corresponding image-file, as shown in the movie-clip below (please note: The
quality of the movie does not reflect the high rendering-quality of the real
tooltips):
In
the following we will have a closer look at the important details in the
source code of this sample application. The source-code and
the corresponding Visual Studio project for this sample can be found in the
"<ToolTipsFactoryHomeDir>.\Samples\UltraWinGrid1"-directory.
Also
with the
Infragistics
UltraWinGrid-control we need to keep track of the grid-row, over which the cursor is
hovering. In contrast to our generic solution, the position is stored in a
data-type provided by the UltraWinGrid-control and not in a
Point-structure:
Public
Class
Form1
Inherits System.Windows.Forms.Form
...
'Holds
the row/column-coordinates of the cell on which
'the
mouse is hovering...
Private mCurrentCell As
Infragistics.Win _
.UltraWinGrid.UltraGridCell = Nothing
...
As we showed for the generic grid-control (in the section on "How to use ToolTips with grid-controls"),
the whole logic, to keep track of the current mouse-position in terms of
grid-coordinates (row/column) and to provide the tooltip with the content of
the current grid-element, is located in the MouseEnter, MouseLeave
and MouseMove event-handlers. This is slightly different for the
UltraWinGrid-control. Of course, the needed logic is also coupled to
mouse-events, but the UltraWinGrid-control provides additional mouse-related
events, which make the integration even easier.
In
the generic approach, the MouseMove event-handler was also needed to
determine whether a new cell or row has been reached, while the UltraWinGrid-control
will fire a MouseEnterElement-event to signal this state. Only if this
event is fired, it will be necessary to test, if the current row has changed.
The use of the MouseEnterElement-event allows to integrate the ToolTipsFactory
tooltips with only two instead of three event-handlers, as in the generic
approach.
As can be seen from the listings below,
this implementation differs only insofar from the generic approach, as it is
easier and needs less code:
Private
Sub
dgImages_MouseEnterElement(ByVal
sender As Object,
_
ByVal e As
Infragistics.Win.UIElementEventArgs) _
Handles
dgImages.MouseEnterElement
'Translate the current MousePosition into
'grid-coordinates
(row/column)...
Dim
cell As
Infragistics.Win.UltraWinGrid.UltraGridCell
cell = e.Element.GetContext(
GetType(Infragistics
_
.Win.UltraWinGrid.UltraGridCell))
'If the cursor
points to no cells in the grid (free space)...
If
IsNothing(cell) Then
'..any still visible tooltip has to be switched off.
Me.ImageTT.Reset(dgImages, True)
mCurrentCell =
Nothing
Exit Sub
End
If
'If
the mouse did not move on to another row, the image to
'be
displayed in the tooltip is still the same and no further action
'is
required.
If
Not mCurrentCell Is
Nothing Then
If cell.Row Is
mCurrentCell.Row Then
mCurrentCell = cell 'maybe
the column did change.
Exit Sub
End If
End
If
'The
cursor has crossed the border to another row since the
'last
MouseMove-event. Therefore the new row becomes the
'current row.
mCurrentCell = cell
'The
cursor points to a normal datarow. Therefore
'we
can initiate the display of the image in the tooltip.
'But
before the new image is loaded and displayed by the tooltip,
'the
tooltip with the previous image should be turned off first.
'(This is not necessary for small images, because they load
'almost instantly, but with large images it is possible that the
'old
image is displayed to long over the current row, what can be
'confusing for the user.)
Me.ImageTT.Reset(dgImages,
True)
'To
get the actual image, it has to be loaded from file first.
'The
filename of the image is stored in Column 0 of the grid.
Dim
filename As String
= mCurrentCell.Row.Cells(0).Text
'We
should first check, if the file really exists, before
'we
try to load and assign it to the tooltip.
If
IO.File.Exists(filename) Then
ImageTT.Start(dgImages,
Image.FromFile(filename))
End
If
End
Sub
Private Sub
dgImages_MouseLeave(ByVal
sender As Object,
_
ByVal e As
System.EventArgs) _
Handles
dgImages.MouseLeave
'As
soon as the mouse leaves the grid, it can't be
'pointing to
a datarow or cell. Therefore we switch
it "off"
Me.ImageTT.Reset(dgImages,
True)
mCurrentCell =
Nothing
End
Sub