This chapter describes the functionality and the usage of
the ToolTips layout override-designer. The tooltip layout override-designer is only available
during design-time inside of Visual Studio (or any other container or
development-tool that supports the required interfaces).
The generic functions and the handling of the layout override-designer are the same for
all ToolTipsFactory tooltip components - only the exposed
layout-properties will vary.
Background
As explained in the section on "Provided Properties", a ToolTipsFactory tooltip component added to a form provides a new property to all controls on the same form. Through this provided property (which is a reference to a rather complex object) it is possible to specify individual tooltip content and layout properties for each control as shown in the picture below:

The Override-property of this extended property gives access to more properties and objects with the option to override any layout element of the base layout as it is defined for the component (see ToolTips layout designer).
All layout override-properties can be accessed and modified through the Override-property of the selected control right inside of the Visual Studio property-grid as described in "Provided Properties: The Override-Property".
It is really straightforward if every layout-property of the tooltip component's base layout can be overridden directly through the property-grid of Visual Studio. The only problem is, that there is no visual feedback on how the tooltip will look when this changes are applied to the base layout. As seen in the chapter on the "ToolTips layout designer", there is a solution to this problem at the tooltip component-level (where the base layout is defined): A double-click on the tooltip component in the component tray opens a designer with a property-grid and the possibility to test the tooltip and therefore get instant visual feedback on how the specified values affect the look of the tooltip.
The good news is, there is an almost identical facility to interactively design the overridden tooltip layout.
Access the Layout Override-Designer
To get access to the layout override-designer for the tooltip provided to the selected control by a specific ToolTipsFactory tooltip component, you have to first select the corresponding tooltip-property in the "ToolTipsFactory"-category (there may are more then one, depending on the number of ToolTipsFactory tooltip components on the form), expand it and then click on the Override-property:

As you can see in the image above (or live in Visual Studio), a button with
an ellipsis appears in the value field of the Override-property. This
indicates that a more sophisticated editor or designer is available to edit
the Override-property. A click on this button will then open the
corresponding designer:
The Layout Override-Designer form
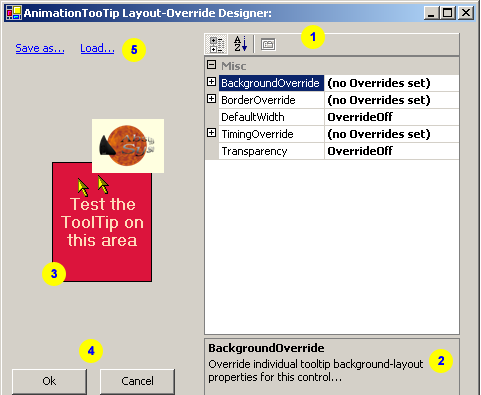
The layout override-designer form consists of five distinct areas or functional groups (see Picture 1). An overview is given in the following table:
| This
is the property-grid, which exposes all layout override-properties for
the tooltip of the selected control. Because this property-grid is nothing more than an
incarnation of the known Visual Studio property-grid, it's usage
should be familiar to all Visual Studio users. It allows to change
every layout override-property of the control's tooltip by just entering or selecting the
desired values or attributes.
The usage and logic of the Override-properties and their editing in the property-grid of the designer is almost the same as described in the previous section. The only difference is, that the values cannot be reset through the context-menu of the properties. The numerical values can be reset by entering -1 or another invalid value for the given property, while properties with dropdown-lists can be reset through a corresponding value (OverrideOff) in the dropdown-list. The expandable properties (BackgroundOverride, TiminingOverride etc.) can only be reset through the normal Visual Studio property-grid as described in the previous section. |
||
| This area shows descriptive information about the currently selected property in the property-grid. | ||
| As
the text in the red area already says, this is the test-ground for the
tooltip. If the mouse-pointer is moved over this area, a
tooltip will appear:
This feature allows you to check how changes to the override-properties will affect the appearance of your tooltip right inside of Visual Studio. There is no need to compile and run the application. |
||
| This two buttons do not really need much explanation because they implement the classical behaviour: [Ok] will commit the currently defined layout-override, while [Cancel] dismisses all changes made to the layout-override and restores the values that were in effect before the layout override-designer was opened. All changes will be reflected in the Visual Studio property-grid. | ||
| The command-verbs area holds several commands to load and save complete layout override settings: | ||
|
Load... |
A click on this
command-verb opens a file-dialog to select and load a file with
ToolTipsFactory layout-override settings. The file-dialog's default file-type filter is set to "ToolTipsFactory override" layout-files, which use .tto as file extension. The file-type filter can be changed to show all files in the selected directory, which gives the possibility to also load regular ToolTipsFactory layout-files (i.e. files with the following extensions: *.mtt, *.itt, *.att, *.stt) which where saved through the ToolTips layout designer at the component level. Of course only the values for which there are matching properties will be loaded and assigned. This feature makes it easy to quickly use a regular tooltip layout as override-layout for the tooltip of a specific control. Saving and loading layout override settings is also a convenient way to easily assign the same layout override settings to the ToolTipsFactory tooltips of other selected controls on either the same or on different forms of the same application. |
|
|
Save as... |
A click on this command opens a file-dialog, where the user can specify a filename and a location to save the current layout override settings. This settings from this file can then be easily loaded and assigned as layout override settings for other controls. | |
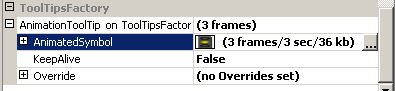
One may wonders, where's the difference to the ToolTipsFactory Layout-Designer? One difference becomes obvious, if content is entered into or assigned to the tooltip-property of a control and the Layout Override-Designer is opened. In the following example we assign the "TrafficLight.afx" animation (the file can be found in the "<ToolTipsFactoryHomeDir>\Animations\"-directory) to the AnimationToolTip-property of a control:
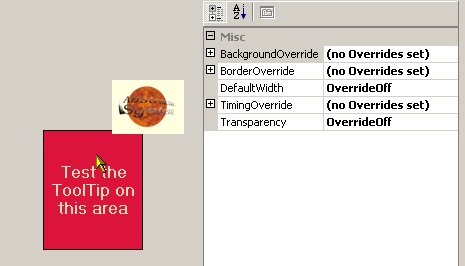
If the Layout Override-Designer is opened now and the pointer moved over the test-area, the difference to the normal Layout-Editor becomes visible:
|
|
|

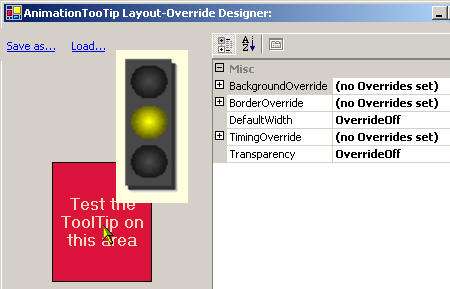
While the normal tooltip layout-designer (to design the base layout for a tooltip component) shows a tooltip with the specified layout but with sample content provided by the designer itself, the Override layout-designer shows the tooltip with the tooltip content specified for the selected control.
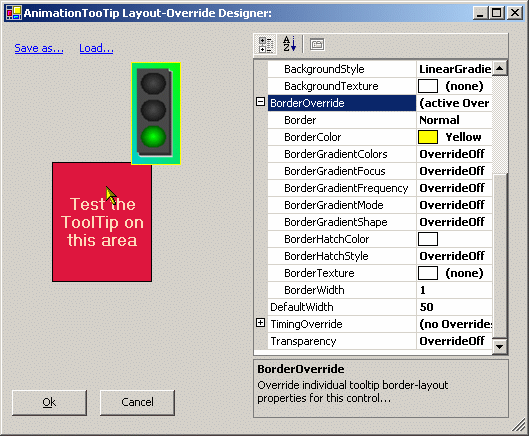
In the example above, none of the properties of the base layout have been overridden for the selected control. The Layout Override-Designer shows the tooltip with the basic layout specified for the component. If one or more properties in the Layout Override-Designer are changed from "OverrideOff" to some other value, we'll see that this changes are reflected by the tooltip as soon as the pointer is moved on the test-area again. So, by overriding the following values in the override layout-designer...
| BackgroundStyle: | LinearGradient |
| BackgroundGradientColors: | Lime and Dark Turquoise |
| DefaultWidth: | 50 |
| Border: | Normal |
| BorderColor: | Yellow |
| BorderWidth: | 1 |
...we should get the following tooltip displayed, which proves that the basic layout provided by the tooltip component to all controls on the form has been overridden for the selected control: